Thursday, May 5, 2011

Butterfly Dress

  I was motivated to get a project done that I had been putting off.  The Etsy Inspired Challenge EIC #137 helped get the ball rolling.  This awesome piece, La Robe, was an inspiration. 


I was asked to create a butterfly gift.


  This will slide into a 4X6 clear magnet frame. 

Thank you for stopping by and checking it out. ;)

MS stamps, JustRite Curlz font, Versamark Ink, black embossing powder, Prismacolors pencils, MS ink with dauber, glimmermist, Prismacolor blending pen, Pebbles Shimmer Chalk

Wednesday, May 4, 2011

For the D Man

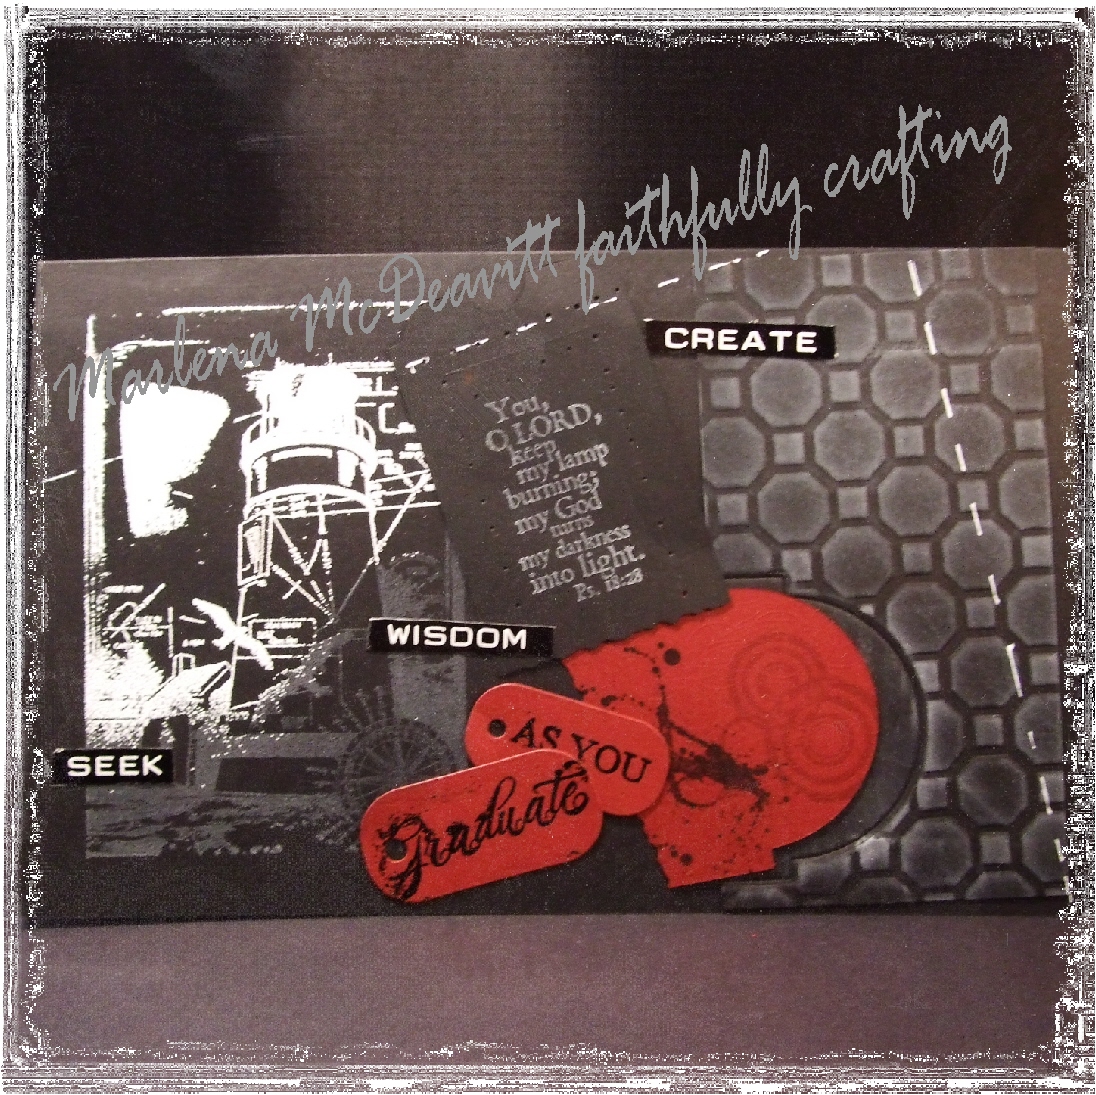
   Another masculine card!!!

It's for the D Man

     This card is for the D Man.  I call him D for anonymity.  D Man is on my yearbook committee.  He's a serious young man who loves God's word with a passion, and defends it with certainty!  I hope he likes this card. 
   God gave me the idea to start a yearbook committee for our homeschool group.  I created the yearbooks last year and the older kids helped assemble them. This year I delegated other tasks to the students.  They were given photo assignments, and my friend/helper Esther requested they write articles.  

I based D's card off of the yearbook tags I made. 
These signified "Official Yearbook Business".
He took his home every month.  I think he liked it. :)
   
  Our Daily Bread's On Assignment Challenge 33  is getting another entry from me.  I paper pierced a little around the Bible verse.  I am also submitting this to Papertrey Ink's Make it Monday #13 Impression Plate Tricks #2 , since I practiced the impression/embossing technique again!


    With so much going on with this card...it's nice to have a focal point.

    I also want to add that I tried something different from the last time I used this ODBD lighthouse.  I white embossed half of the image....hopefully capturing how light isn't "All or nothing".  

    I hope he understands all the little messages I scattered here.  He is very serious about his photography, so I added "create".  I pray D keeps his strong faith in God.   Psalm 18:28 reminds us that the Lord keeps our lamps burning.  HE turns our darkness into light.  We were once darkness, but now are light.;)  Ephesians 5:8

Congratulations D Man!

All about this card and tag:
Stamps: ODBD Keep My Lamp Burning, PTI Grunge Me, Ellison Backgrounds for YB tag
Ink:Versamark, VersaMagic Cloud White, clear embossing, black embossing
Other: PTI Mat Stack 3, Sizzix Texture Plates,Faux Stitching with uni-ball Signo broad, Sizzlits letters (YB tag), digital graphic, Random dies (seek, wisdom, create) acquired from "who knows"



Tuesday, May 3, 2011

Window to the World Graduation Card

     Papertrey Ink's Make it Monday #13 Impression Plate Tricks #2 was a fun one!   Erin's tutorial is wonderful; I'm glad she emphasized the importance of paying attention to the direction of the die.  I used my Sizzix texture plate, and the Mat Stack 3 Die.  It created the "Window to the world" look I envisioned.

      I want to give credit to Lindsay's You Make the World card in the last PTI challenge.  She masked off the CARD (instead of an image), and stamped WITHIN a frame; how cool is that?  That is what inspired me to stamp within the window.  
       I wanted to "float" the sentiment, because I like how the sentiment sits in the nook of the window.  I used a section of "Clear PVC cover" beneath it.
I am also entering in Less is More's Week 13 Lucky Dip Thank you or Congratulations.  This gives me a running start on my graduation cards! 

Thank you so much for stopping by. :)


Supplies:
Stamp: ODBD As You Graduate
Ink: MS, clear embossing powder
Other: PTI Mat Stack 3, Sizzix Texture Plate, Sizzix bookplate die

Monday, May 2, 2011

Soft Hues, a Tissue Box, and a Square CD Card

      I wanted to try another CD card since my Grunge CD Card was so much fun. The Square Cards Color Trends Challenge seemed like the perfect opportunity.  I WAS intimidated, however, by the colors...


     I don't present "Shabby Chic" well.   This discouraged me,
     until my husband brought home this box of tissue from the grocery.


    I thought, "Hey, those are soft hues!".  Here is what I came up with...


     To make the CD part, I cut out a blue "CD" with my Fiskar's Circle Cutter, and then a smaller one in cream.  I embossed the cream disc with a musical cuttlebug folder which I had inked up in a light blue. I used Just Rite's You're So Sweet and colored part of it with a pink copic.


     I didn't anticipate the challenge of focusing on the "squareness" of the case.  I decided to attach the floral, leafy elements to one side so that it layered the finished CD card when closed.  I flipped open the case and Modge Podged die cuts to the inner front.  It dried clear with a dreamy look.


     It almost looks like stained glass.  
    
     I planned all along to give it to our Handbell Choir Director.  If she wanted to display her CD Card, it seemed like it would be more durable than a regular card.  That is one nice thing about this style, it doesn't need a stand! 
   Our director works so hard by leading the Handbells, and circling our notes.  My daughter Shelby and I can't read music, yet, so we really appreciate this!  Left hand is squared, right hand is circled! :) Only God knows that I secretly had a childhood dream of playing an instrument.  I never had music lessons, and now, here I am, blessed to practice handbells every week with my daughter.  We even play at our church service once a month.  It just blows my mind that God would orchestrate a way to fulfill my dream.  1 Cor 2:9

It's little things like this that lead me to trust Him in big things.


Thank you so much for viewing my project today! 

Stamp Recipe:
Stamp: Just Rite You're So Sweet
Ink: Memento Summer Sky, clear embossing, copic pen
Other: Fiskar's Circle Cutter, Modge Podge, Sizzix Sizzlets Flowers, Branches and Leaves, Spellbinder Fleur De Lis Pendant Die, Spellbinders circle die, Cuttlebug embossing folder Allegro

My Mulan Card

  The Play Date Cafe Challenge PDCC79 called for some striking colors:


   I hardly had any gray paper or embellishments, but had just enough to make the border die. 


   I sponged Staz On dove gray ink on a white card base after stamping my SU background with red and clear embossing.  I colored in various areas with two different grey copic markers to add some interest.
   I found this little lime dragonfly I had randomly cut out from my die. It seemed like he wanted to make his home here.  I thought of the cricket from Mulan (in fact, I thought it WAS a cricket until I typed in the stamp recipe for this post, LOL).  He added enough quirkiness, and I was happy to use the little guy.

Thank you for dropping in!

Stamp recipe:
Stamps: SU Fresh Cuts
Ink: Brilliance Rocket Red, clear embossing powder, Staz On black,dove gray,MS Wasabi
Other: PTI eyelet lace die, Ellison thin cuts dragonfly and tag die
Paper: Georgia Pacific white cardstock, green vellum, red cardstock


Sunday, May 1, 2011

Our Unknown Future

  None of us know what our futures hold, do we?  One minute your house or loved one is safe, and the next....well, unfortunately, so many have sad, sad accounts they have just experienced.  How can anyone not have fear right now, with everything going on in our world.
  Have you heard of Corrie Ten Boom?  Do a search on her...she lived quite a life.  I just recently finished "The Hiding Place".  Talk about a comforting message she has to share!  Despite all she had gone through, she still managed to have peace and hope.  We all need that peace in our hearts, don't we?  Hence her quote, beautifully captured by ODBD .  It reminds us of WHO is in charge and WHO DOES know what our futures will bring.


   I love this quote; I love that it is from Corrie Ten Boom; and I love that it is so fitting for us, right now, in light of the fears we have. I was motivated by Our Daily Bread's On Assignment Challenge 33, which calls for paper piercing. I did a little of it here and managed not to poke myself. Aren't you proud? :)

  If you look at the the black leaves, you will see my minor attempt at this craft.  It's kind of fun, really.  I am new to "serious" stamping, and you might be also.  Serious, meaning, I actually try to stamp an image MORE THAN ONCE (shocker :) ) to get it right. 
  In case you didn't know (I didn't, until one blog was nice enough to mention it-sorry, there are so many nice ones I don't remember who), there is a piercing tool for this technique.  I am pretty sure mine was under $4.  It has a wooden handle, which is easier to hold on to than a needle, I am sure.  I HAVE poked my fingers with the dull, HIND end of a needle before. Sooooooo not fun, as you can imagine (or remember :) ).
   
   I'd like to add that my trendy daughter Mallory was the inspiration for the colors in this card.  The backdrop is her pillow and my card is sitting on her dresser. 
               This is her desk.  See her Hot Pink wall?   


   It was her idea to get "French Provincial" furniture which is usually white, and paint it black.  How cool is that?  What is even cooler?  We were able to buy all her furniture pieces for under $100.  We didn't just paint them, we SPRAY painted them, with Rusto-oleum spraypaint (black satin). I read that it could be done.  It can!  Only warning - when buying older stuff...keep it OUTSIDE until you have cleaned it properly.  You should treat any hint of mold with clorox...it's not worth introducing that nastiness to your house. 
Also to share...there is a party going on at Joyful Stampers Inspire Me Fridays.  Check it out!

  Thank you so much for visiting me today and may God bless you and grant you His peace.

Stamp Supplies:
Stamp:ODBD
Other: SU lattice die (cut in half and I used the little pieces left over as leaves); Sizzix Sizzlets Flowers, Branches, Leaves, random button, Bazzil Basics piercing tool (comes in holder...safe to store), Fiskar's Rotary Trimmer with scallop blade
Ink: Versamark, black embossing powder